
October 6, 2026
Chain Bridge Budapest photo spots: portraits on and beside the bridge
Blue-grey iron rises towards pale stone towers, lamps hang between the lines and the Danube moves below. On Budapest's Chain Bridge, the city appears in little pieces as you walk: a dome through the metalwork, a hillside beyond the railings, a new angle around the next tower. It's a wonderful place for photographs that feel like you're exploring together.
Step onto the Pest riverbank and the feeling changes. The bridge stretches across the water with Buda behind it, leaving more of the city around you. These two settings give you a useful choice: close, architectural portraits on the pedestrian walkway or a broader scene beside the river. You can enjoy either on its own, or make a small outing of both.
Updated
Table of Contents
Choose between the bridge and the bank
Choose the Pest bank if you'd rather see the bridge as part of Budapest's river landscape. There, the space between you and the bridge helps separate a person from the busy detail. A wider photograph can include the water, a tower and the Buda hillside, with room to show how you stand or walk together.
The main difference is how long you can comfortably linger. The walkway is a route across the river, so pictures work best as brief moments within a walk. The open bank we visited gave us more room to choose camera positions, although its rough surface needs a careful look on arrival. For several people, or anyone who wants time to settle into a pose, that extra room may matter more than being surrounded by the bridge's ironwork.
Photograph Chain Bridge's ironwork from the path
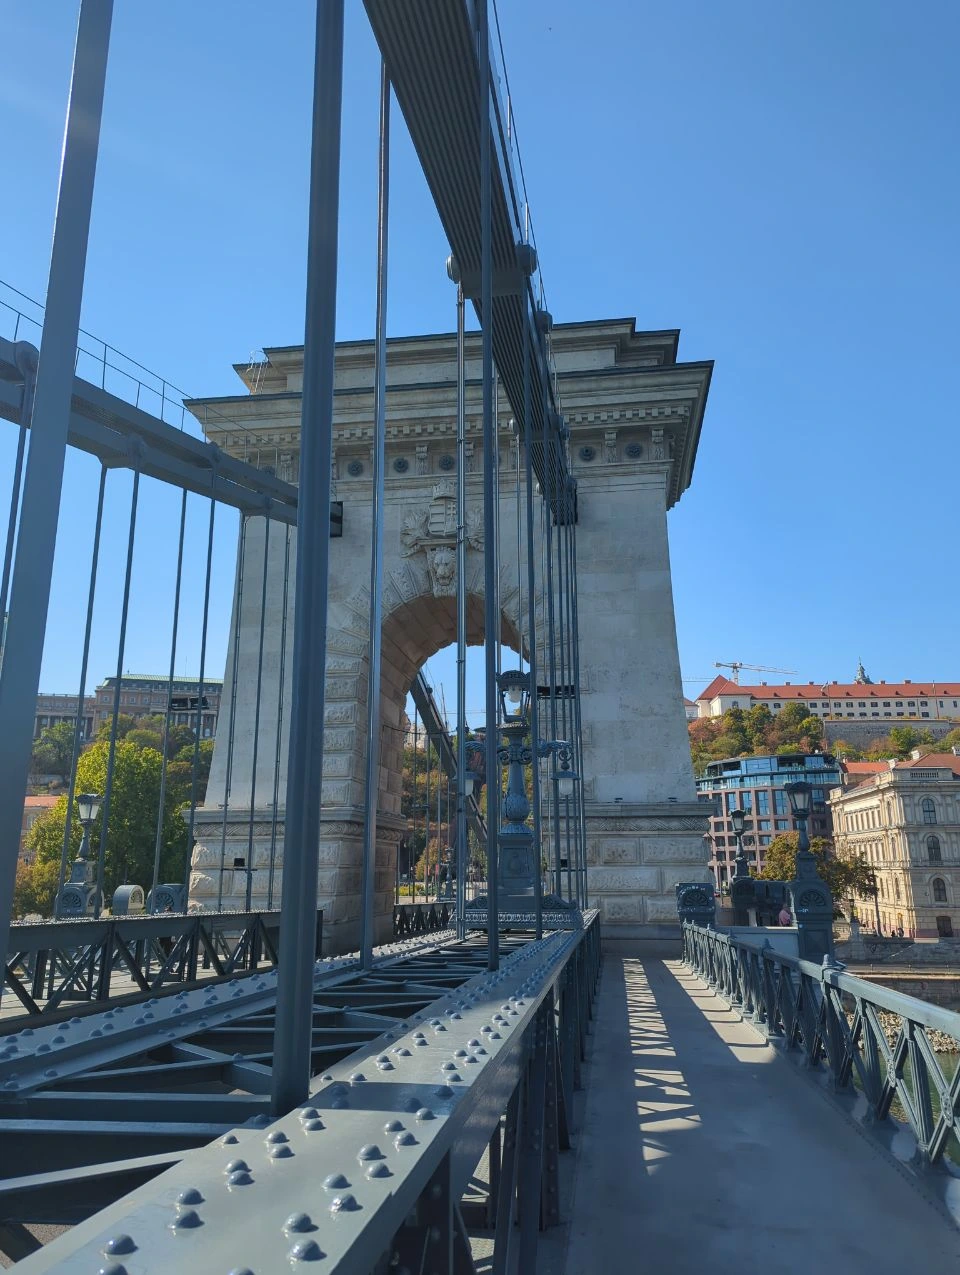
Along the walkway, vertical metal pieces and rows of rivets break the view into smaller spaces. Start with one gap that leaves your face clear. The photographer can move a little along the same path to find where a line falls beside your shoulder rather than straight through the middle of the portrait. Tiny changes can make a surprisingly large difference when the foreground is this busy.
Your photographer can use the metalwork near the edge of the photograph while you stand a little farther along the path. That creates a sense of looking into the scene, with the stone tower beyond. Leave enough space around you in the picture to be noticed; including more iron doesn't automatically make a stronger portrait.
The structure is a background and a frame, not somewhere to sit or climb. Keep the pose on the walkway and let a hand held between you, a turn towards the camera or a few easy steps bring the movement. The bridge already supplies the dramatic lines. You only need to look comfortable among them.
Find a new angle at the stone tower
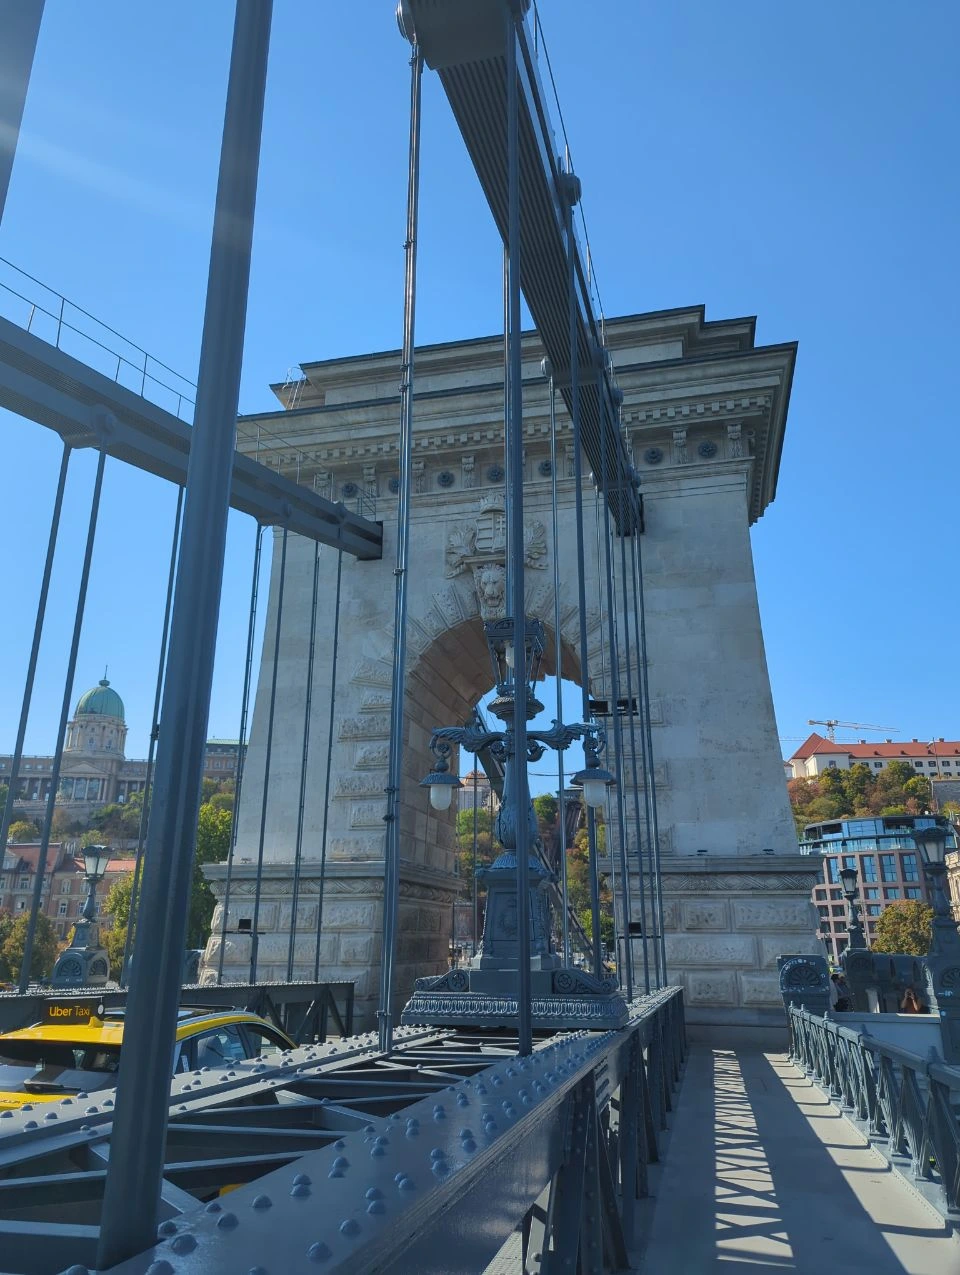
If there's room without holding up people passing, let one person stay a little farther along the same walkway while the photographer looks from around the bend. The tower can fill one side of the image, with the path drawing your eye towards the person. A slight turn of the shoulders may feel more natural here than standing squarely towards the camera.
Check the space around the person's head before making the picture. A nearby metal line can appear to cut through hair, while a stone edge can merge into a shoulder. A small change in where the photographer stands often separates those shapes. Keep that adjustment within the pedestrian area rather than moving towards the roadway to chase a straighter angle.
The contrast is part of the pleasure: the smooth, heavy stone feels very different from the slender upright pieces and little rivets around it. Make one photograph that includes the tower's height, then a closer one that borrows only its edge. You can leave with two distinct pictures from almost the same position, without turning a busy corner into a long photo session.
Look for lamps and glimpses of the city
For a photograph with someone in it, see whether the lamp can sit beside them or higher in the background. It doesn't need to appear directly above their head. A slightly off-centre arrangement can give both the person and the detail enough room, especially in a tall phone picture.
Then look through the gaps towards the city. Our Buda-facing images include buildings on the hillside, and the closer one has the palace dome towards the left. That layered view feels different from a clean architectural portrait: near metal, a person on the path and a much more distant city behind. Choose one recognisable part of the background rather than expecting every Budapest landmark to appear together.
It's worth taking a few photographs without people as well. A lamp, a curve in the chains and a patch of patterned shadow can remind you of what caught your attention between the portraits. These little details give the walk its character, and they're easy to miss if you're only watching for the next big view.
Meet the lions at the bridge approaches
From an ordinary public pedestrian position, try a photograph that shows a lion with part of the bridge behind it. The relationship between the sculpture and the crossing gives the detail its meaning. You can also make a tighter picture of the head and mane if the surrounding traffic or buildings make a wider view feel cluttered.
These are substantial monuments, so you don't need to stand right against a base to include one in a portrait. Let the lion sit farther back in the scene and keep the person clearly visible in front. There's no need to climb onto the plinth or reach up towards the sculpture.
The bridge first opened in 1849, becoming the first permanent connection across the Danube between Buda and Pest. That small piece of history makes the walk feel a little richer: you're photographing a place built to bring the two sides together, while choosing how to show both in your own pictures.
Make a river portrait from the Pest bank
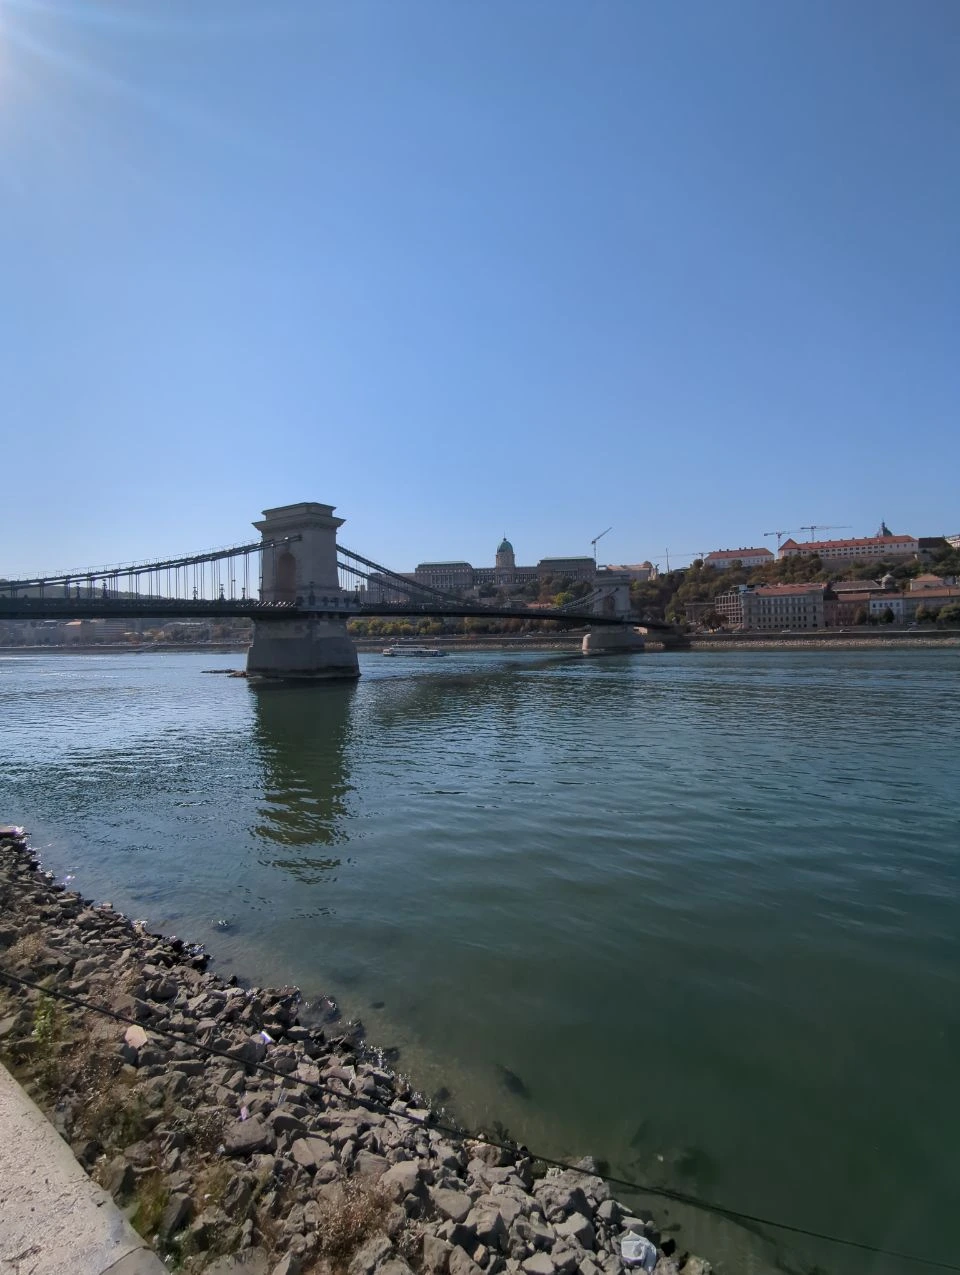
The foreground is quite plain and rough. Our image shows stones along the water, some litter and a low edge rather than a landscaped garden. That matters when deciding how to use the place. Choose a comfortable public standing position well back from the uneven edge; if the gravel doesn't suit your shoes or anyone in the group, use a paved public position and accept a different angle.
For a wide portrait, let the river create space between you and the bridge. The people can be relatively small within the landscape if the feeling you want is being together in Budapest. Keep the river level across the picture and check whether the bridge tower remains clear beside you. A slight change along a usable stretch of bank can alter the way the tower and hillside overlap.
For a closer picture, bring the camera nearer to the people and let only part of the bridge remain behind them. The stone tower and sweep of the chains are enough to suggest the setting. You don't lose the place just because you leave out some of the span, and expressions become much easier to see.
This is also where you can slow down after the brief stops on the crossing. Look across the water together, then turn back towards each other. You may find that the most relaxed photograph comes while you're simply enjoying the view. The bank's appeal is the room to make those choices, rather than a promise of one exact, permanently clear camera position.
Choose light that suits your Chain Bridge photos
Check where the shadow falls on a face. The bridge can cast narrow stripes as well as broad patches, and a dark line across someone's eyes may be more distracting than the sunlight you were trying to leave behind. Moving a little forwards or back along the permitted path can change that pattern. Look again once both of you are in place, especially if one person is taller.
If the river beyond is very bright, decide which part of the photograph matters most. For a portrait, make sure you can see the person's expression before worrying about every detail of the distant skyline. For a picture of the structure, enjoy the strong shapes and patterned shadows. On a cloudy day, the softer contrast may make faces easier to photograph, while the ironwork still gives the scene plenty of interest.
Later light can change the mood, but a famous evening bridge photograph doesn't tell you how well a person will be lit on the walkway. Discuss that with your photographer if your heart is set on twilight. A view of illuminated stone and metal across the river asks something different of a camera from a close portrait of you beside it.
Keep the plan flexible enough to swap the order of bridge and bank. There's no verified illumination schedule or guaranteed quiet hour here. The useful question is where you feel comfortable and where the scene looks good when you're actually standing in it.
Keep your bridge walk flowing
Leave room for other people to continue past. If a pause would make them squeeze around you, carry on and find another moment farther along. A photograph with a little city life in the background can feel warmer than a long wait for everyone to disappear. For a closer portrait, a small gap in the immediate background may be all you need.
Keep bags with you and the space around your feet clear. It's easier to move naturally when you're not stepping around equipment or trying to guard belongings left along the railing. If you need time to adjust clothing or put something away, make that a pause off the crossing rather than part of a pose.
A perfectly centred view along the roadway belongs outside this portrait plan. Vehicles can use the carriageway, and a brief gap doesn't turn it into a place to stand. The walkway's repeating lines, the tower bend and the bank view already give you several ways to make a balanced photograph while enjoying the bridge at a comfortable pace.
Plan your starting point and the time together
Choose your walkway while you're still at a bridge approach. The views and light can differ on the two sides, and changing sides isn't a mid-span shortcut across the carriageway. If you want to try the other view, use the pedestrian connections available at the end of the bridge. That small decision before you start can save a lot of backtracking once you've found your first picture.
The bridge is about 380 metres long, according to the Castle of Buda's historical account. The physical crossing is only part of a photo outing, though. Reaching the meeting point, noticing the light, waiting for people to pass and finding a suitable riverbank position all take time too.
For bridge details followed by Pest-bank portraits, we'd leave roughly 45 to 75 minutes as a relaxed planning allowance. This isn't a timed route or a session package. Start on the Pest side, use as much of the walkway as feels worthwhile, then return towards the bank. You don't have to cross all the way to Buda to make both kinds of photograph.
If the Buda-facing stone-tower view in our images is a priority, plan to walk farther along the bridge to reach that part of it. A short visit near the Pest approach won't reproduce every background in those photographs. Alternatively, begin at Clark Ádám tér, enjoy the crossing towards Pest and finish with the river view on that bank. Agree the finish as well as the start, especially if you have plans afterwards.
Follow the available pedestrian approaches and marked crossings when moving between the bridge and riverbank. Check which public approach to the Pest bank is open and comfortable when you arrive, and choose your standing position to suit the ground you find. For a Budapest photoshoot, the right combination is the one that leaves you enough time for the pictures you love and enough freedom to change the order on the day.
Still deciding on the setting? Compare Budapest bridges for couple photos to see how Chain Bridge differs from Liberty, Margaret and Elisabeth bridges.
Make the two views yours
FAQs
Everything you need to know about our service
Start with clothes you can walk in comfortably. Against busy blue-grey metal, a simple colour or clear shape can help you stand out without competing with every line behind you. For the gravel bank, choose secure shoes or bring a comfortable pair for moving between photographs. If you're planning flowing fabric, think about how you'll hold it clear while walking; you can let it move more freely once you're settled in a suitable open position.
It can be shortened, but discuss your exact needs before choosing it. The photographed riverbank has uneven ground, and this guide doesn't establish a continuous step-free route from a particular stop, hotel or drop-off point. Ask your photographer to check the current approaches, crossings and proposed standing positions. A small number of pictures from suitable paved areas may be a better plan than including the gravel bank simply because it's shown here.
It can be a meaningful setting if the bridge matters to you, but plan it as a public place with people moving through. There isn't evidence here of a private or reserved spot. Talk through where you'll pause, where the photographer can stand and how you'll adapt if that space is busy. If an unhurried moment matters most, give the amount of usable space as much weight as the background you love.
The scene ideas work for handheld phone photographs too. A tripod or a larger setup needs more thought because it takes up room that other people may need. Check the current arrangements for your intended setup rather than assuming an ordinary walk permits any equipment. On the bridge, keeping things light makes it easier to move with the pedestrian flow; save any longer setup for a suitable place where it's allowed and won't obstruct others.


How to Propose in London

Couple Photoshoots in London

Best Photography Spots in Lisbon: Choose the Look You Love

Our 12 Favourite Places to Propose on Holiday

What Does a Marriage Proposal Mean, and Why Does It Matter?

Why Do We Propose With a Ring? The Meaning Behind the Tradition
ENJOY $20 OFF
Your first photoshoot when you become an email subscriber.
Related Articles

How to Propose in London
Make the surprise feel like you.

Couple Photoshoots in London
Choose the London setting you love, and we’ll shape one relaxed route around it.

Best Photography Spots in Lisbon: Choose the Look You Love
Choose the Lisbon photo setting that suits you, from Alfama lanes and hilltop views to Bica, Belém, MAAT, the Tagus and yellow trams.