
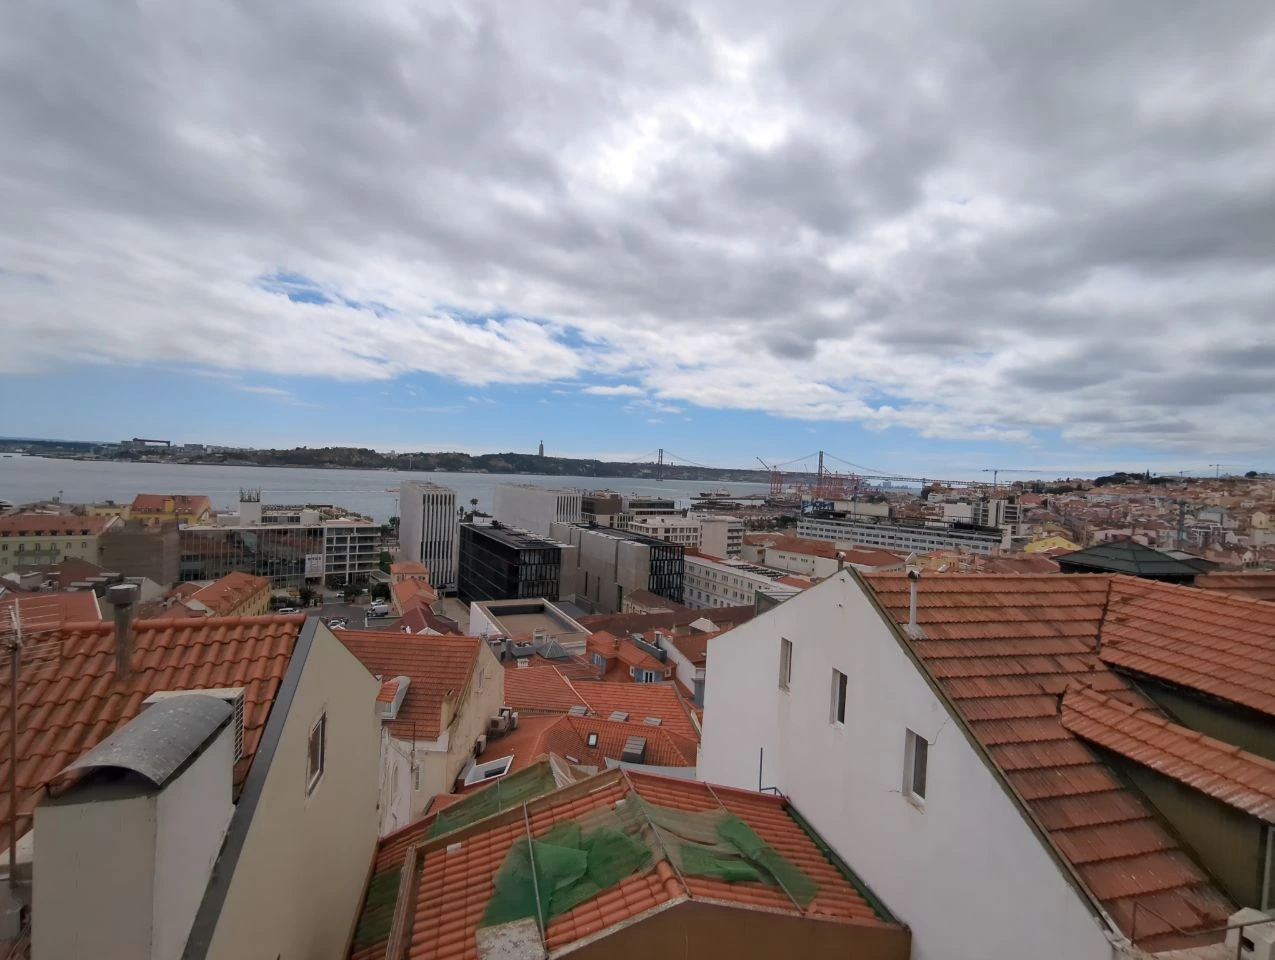
Bica Photoshoot Route: Chiado to Rua de São Paulo on Foot
From Largo do Calhariz, Bica drops towards the lower city in a rush of rails, balconies and colourful façades. It’s the view most visitors recognise, but it’s only the beginning of the story. Walk down through the neighbourhood and the street keeps reinventing itself, from polished Chiado tiles to a tighter, livelier middle stretch and a final uphill view from Rua de São Paulo.
Updated
Table of Contents
Why the Bica Lisbon photoshoot route works beautifully on foot
Visit Lisboa’s official Elevador da Bica page says the line connects Largo do Calhariz with Rua de São Paulo and confirms that you can walk the descent. When this guide was checked on 4 September 2026, the attraction was labelled temporarily closed, with no reopening date listed, so check Visit Lisboa or CARRIS again close to your session.
The route becomes more dramatic as you walk. You begin among the quieter Chiado façades before reaching the open view from the top of Bica, then gradually move into the livelier streets below. Each part looks noticeably different, so one hour can feel varied without sending you across half of Lisbon.
Photographed by Travaya Photographers
Start with Chiado tiles before the rails appear
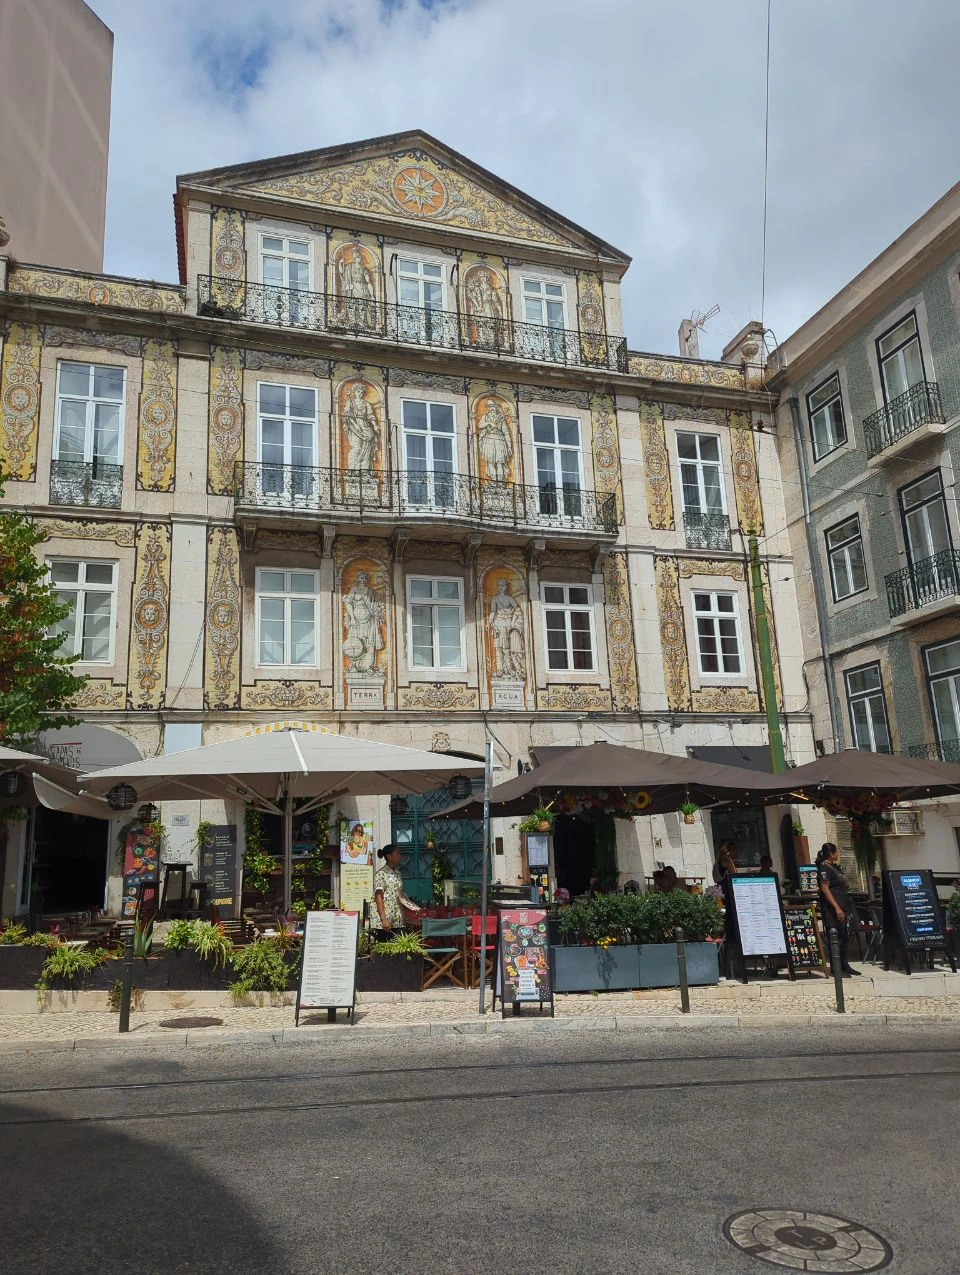
You won’t need to arrive with a list of poses. When pavement space allows, Casa Ferreira’s detailed tiles work well for simple walking photographs, relaxed portraits and small interactions with your partner or family. By the time you continue towards Bica, you’ll already feel comfortable in front of the camera.
Rua da Misericórdia 88-92 offers another tiled façade on the way to Largo do Calhariz. It’s a worthwhile extra rather than an essential stop, so you can pause when there’s enough pavement space or continue straight towards Bica when the street feels busy.
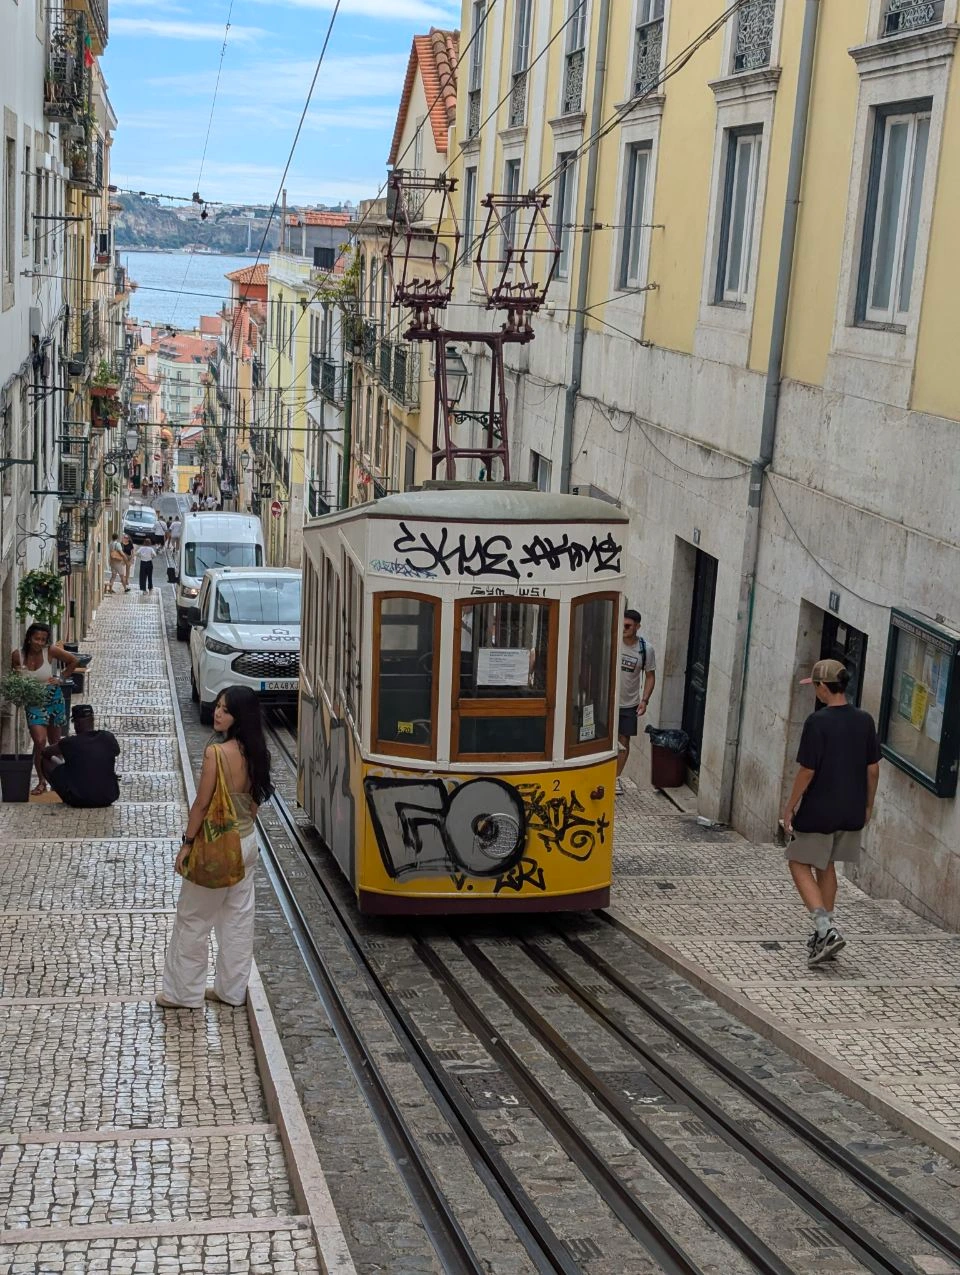
That short approach makes the Calhariz reveal even more exciting. The neat patterns of Chiado suddenly give way to a steep rail street filled with balconies, washing lines and tightly stacked buildings, with the city drawing your eye towards the bottom of the hill.
Photographed by Travaya Photographers
The 60-minute Bica Lisbon photoshoot route
Stay on the pavement throughout the downhill route; you never need to stand on or step onto active rails for a strong Bica photograph. If time is tight, skip Rua da Misericórdia first, while 99-101 can remain a quick finishing extra. That keeps the three rail perspectives at the heart of the session.
Three rail views, three completely different photographs
Travessa da Laranjeira places you inside Bica instead. The buildings appear closer, the street feels more layered and the yellow upper station arch becomes a distinctive detail in the background. It’s a more intimate view, with the neighbourhood wrapping around the portrait rather than stretching into the distance.
Rua de São Paulo reverses everything. You’re now looking uphill, so the slope appears steeper and the rails climb through the buildings behind you. There’s a satisfying sense of arrival because the street you first saw from above has become the backdrop to your final rail photographs.
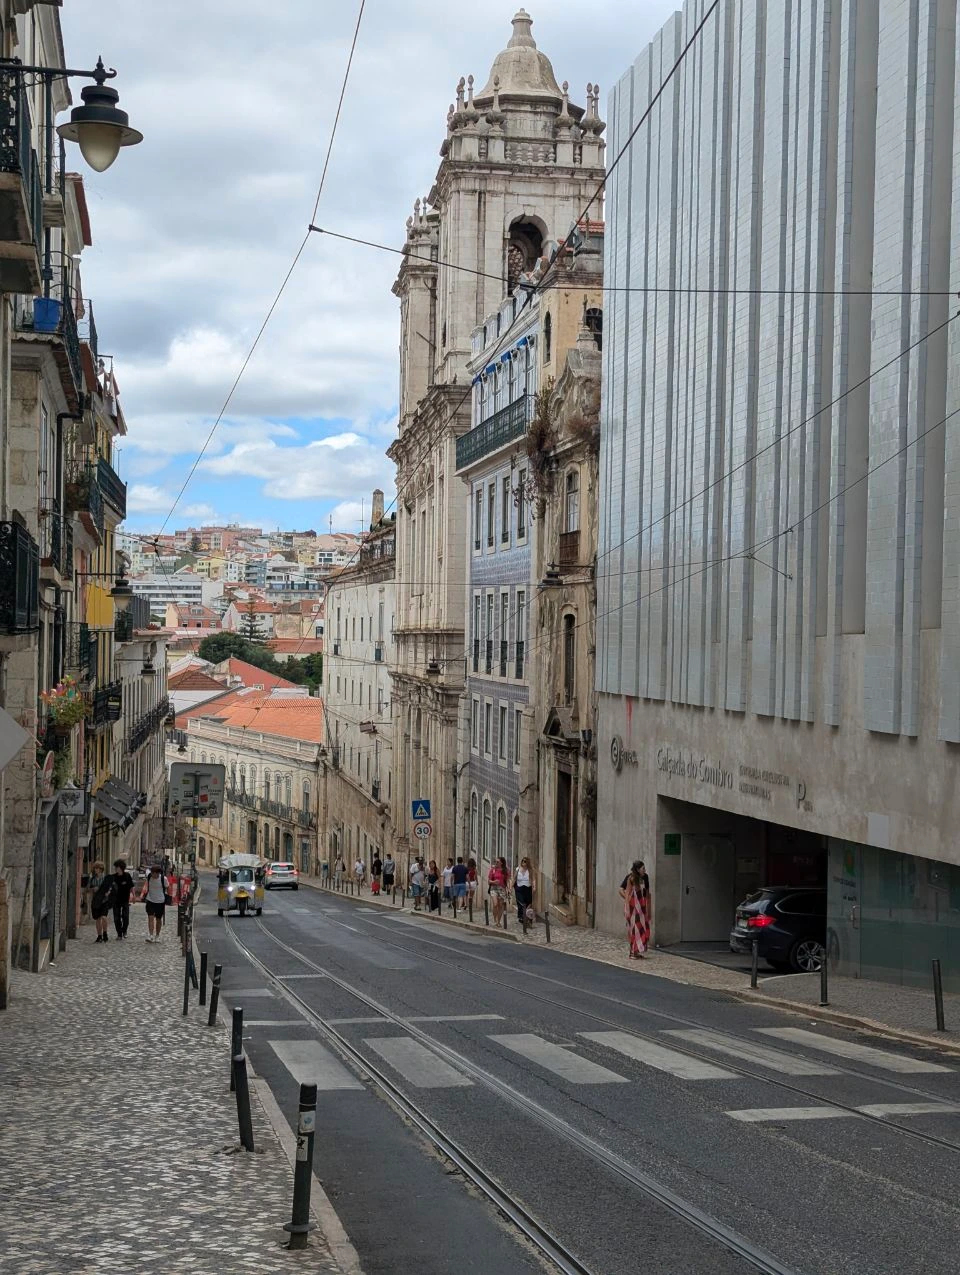
Photographed by Travaya Photographers
What the extra 30 minutes genuinely adds
Use the first part of the 90-minute session for either extension, then begin the core downhill route at Largo do Calhariz. If you choose Combro, the façades around numbers 35, 49 and 65 add several tile patterns and more time for close portraits before Bica’s wider rail views take over.
Choose Miradouro de Santa Catarina when you want the extra 30 minutes to create the biggest visual change. Its panorama adds sky, distance and an unmistakably wider Lisbon setting after Chiado’s tiles and Bica’s tightly framed streets.
Santa Bica at Travessa do Cabral 37 can add a smaller side-on angle when there’s room and the session is moving comfortably. Think of it as a brief bonus rather than an essential stop. Travessa da Laranjeira and the lower uphill view offer more distinctive photographs, so they’re worth keeping ahead of this detour.
Why walking downhill makes the Bica route easier
Walking time, crowd levels, shade, pavement space and access can all change on the day, sometimes from one block to the next. If a corner feels cramped, your photographer can change the angle, wait for a little more room or simply continue to the next viewpoint. There’s no need to force the shot. The additional tile stops and the Santa Bica detour can be skipped whenever comfort or pavement space matters more.
For a family or maternity session, that flexibility becomes especially useful. The photographer can shorten narrower middle sections, pause in wider pavement areas and spend more time at Casa Ferreira, Calhariz and the lower viewpoint. You can still keep the route’s most spacious and distinctive stops while maintaining a comfortable pace for everyone.
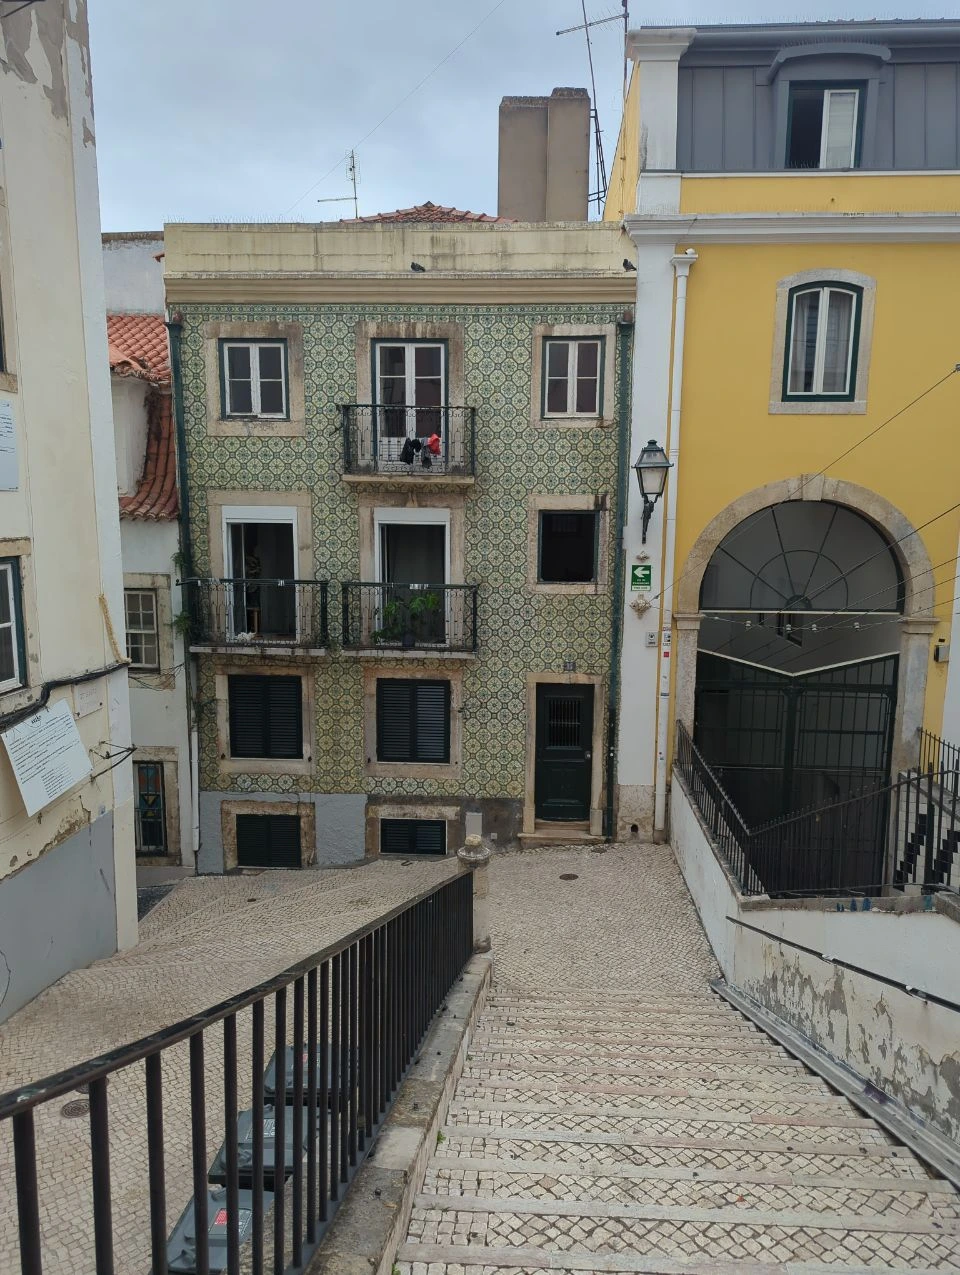
Photographed by Travaya Photographers
Finish on Rua de São Paulo while the city is still buzzing
If you still have a few minutes, continue to the tiled façade at Rua de São Paulo 99-101 for a final change of texture. Its lower-city surroundings feel busier and more lived-in than Chiado, so the photographs won’t simply repeat the opening. Treat this as a rewarding finishing extra rather than sacrificing the essential uphill view at number 234 to reach it.
By the time the session finishes, you’ll have followed Bica from its polished Chiado opening to its livelier lower-city streets. Rua de São Paulo is an easy place to slow down after the descent: find a nearby café, stop for something to eat or continue towards the river at your own pace. It gives the session a satisfying ending without asking you to climb the entire route again.
Plan your Lisbon photoshoot
Bica Lisbon photoshoot route FAQs
Yes, especially if you’ve already photographed Chiado or prefer to spend more of the hour around Bica. Starting at Calhariz gives you more time within Bica itself, while starting at Casa Ferreira adds the tiled Chiado opening.
Head directly towards Calhariz and skip Rua da Misericórdia. The final tile stop can also be shortened, while the three rail viewpoints remain the heart of the route.
It may occasionally be possible, but choosing one usually gives you a calmer experience and more time for photographs. Combro suits tile lovers, while Santa Catarina is the stronger choice for an open city view.
When checked on 4 September 2026, Visit Lisboa labelled Elevador da Bica temporarily closed and did not provide a reopening date. Its page said the descent could be walked on that date, but check Visit Lisboa or CARRIS again close to your session because the status and access may change.
Choose an outfit that allows comfortable, confident steps on Bica’s steep pavement without needing constant adjustment. Solid colours or restrained patterns usually stand out clearly against the detailed tiles, rails and façades. A light removable layer can be useful because sun, shade and temperature can vary along the route, while a small bag keeps your hands free during the descent.
It can work, but the route should remain flexible. Your photographer can prioritise Casa Ferreira, Largo do Calhariz and Rua de São Paulo 234, allow time for pauses and skip narrower sections when necessary. Pushchair access and pavement space can change, so check the latest conditions before your session.


Where to Propose in Florence: Choose the Proposal Style She Would Love
Where to Propose in Florence: Choose the Proposal Style She Would Love
What to Wear for a Temple Photoshoot in Bangkok
What to Wear for a Rome Photoshoot: An Outfit That Moves With You
What to Bring to a Bangkok Photoshoot
Wat Pho or Wat Arun: Which Bangkok Temple Is Better for Photos?
ENJOY $20 OFF
Your first photoshoot when you become an email subscriber.
Related Articles
Where to Propose in Florence: Choose the Proposal Style She Would Love
Find the Florence proposal setting that feels most like her, from peaceful gardens and hidden viewpoints to classic landmarks and stylish rooftop evenings.
Where to Propose in Florence: Choose the Proposal Style She Would Love
Discover where to propose in Florence, from quiet gardens and hidden viewpoints to classic landmarks, romantic rooftops and relaxed Oltrarno streets.
What to Wear for a Temple Photoshoot in Bangkok
Choose a comfortable, respectful and photogenic outfit for a temple photoshoot at Wat Pho, Wat Arun or the Grand Palace in Bangkok.