
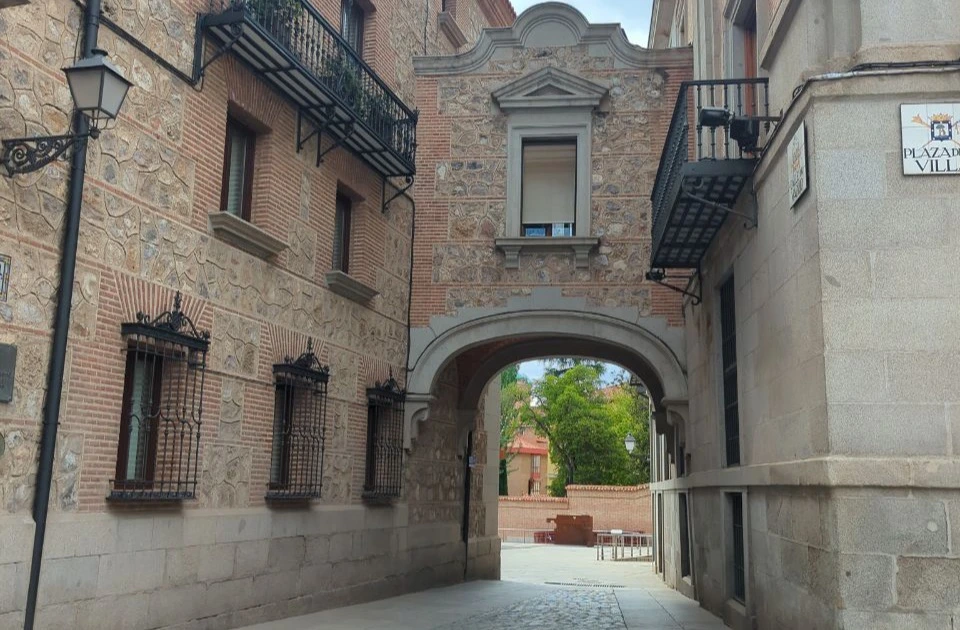
Plaza Mayor and Madrid de los Austrias: An Exact 60-Minute Photo Route
You begin among weathered stone, old wooden doors and the quieter corners of Madrid de los Austrias. A few minutes later, glass and iron catch the light beside Mercado de San Miguel. Then the street narrows and the steps rise towards Arco de Cuchilleros. A moment later, Plaza Mayor opens ahead of you in a sweep of red facades and grand arcades.
This one-hour route creates four different looks with a simple forward flow and short walks between photographs. The pace stays flexible, but the direction is clear: start small and intimate, add a quick burst of city energy, build anticipation beneath the arch and save Madrid’s grandest setting for the finish.
Updated
Table of Contents
Your Plaza Mayor Madrid photoshoot route at a glance
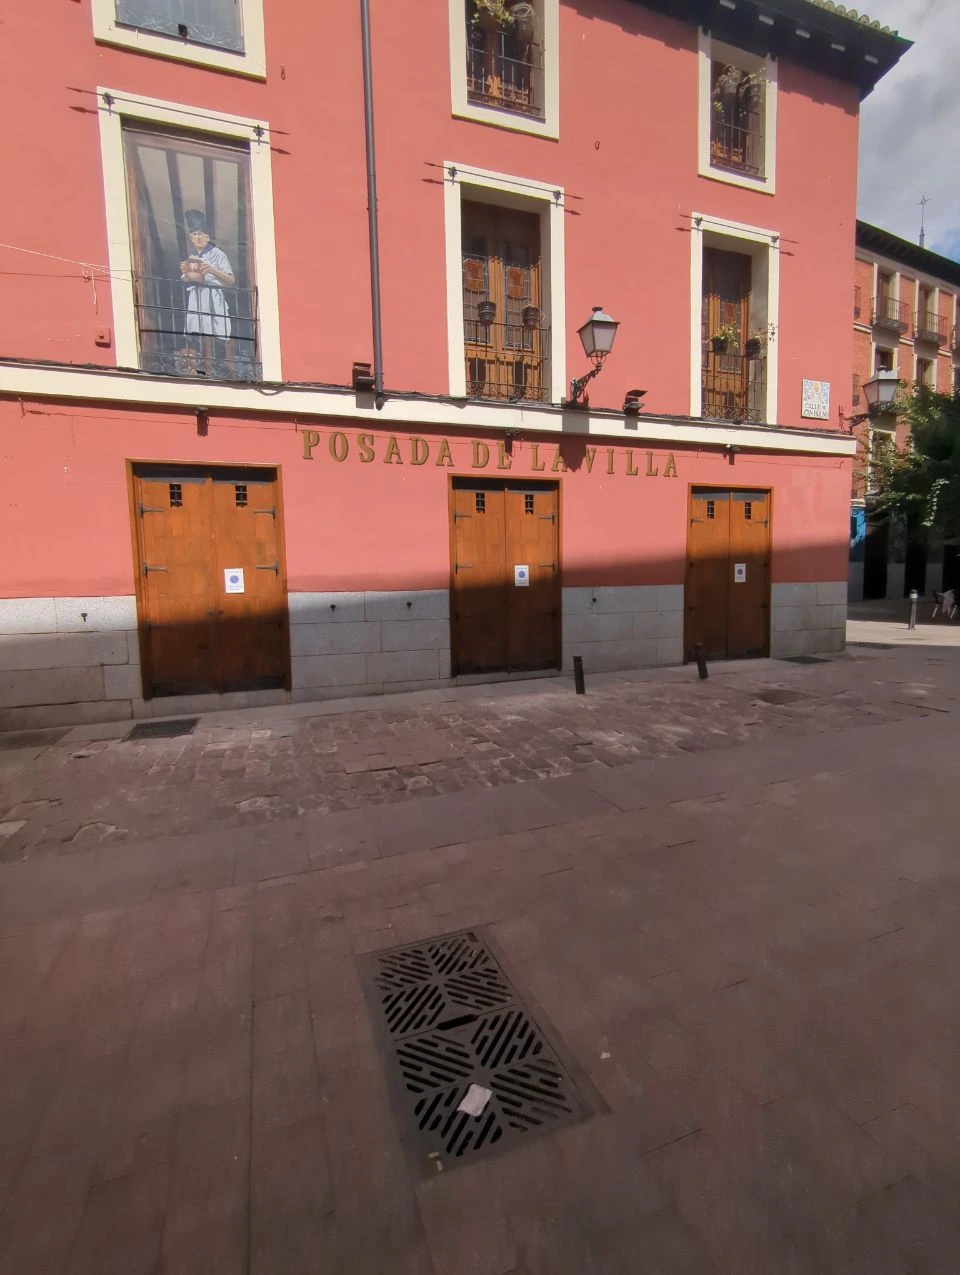
Spend approximately the first 15 minutes in Plaza de la Villa. Its old doors, contrasting facades, stone details and smaller scale give you an easy place to settle in. You can begin with close portraits and gentle movement before the streets become busier and the architecture more imposing.
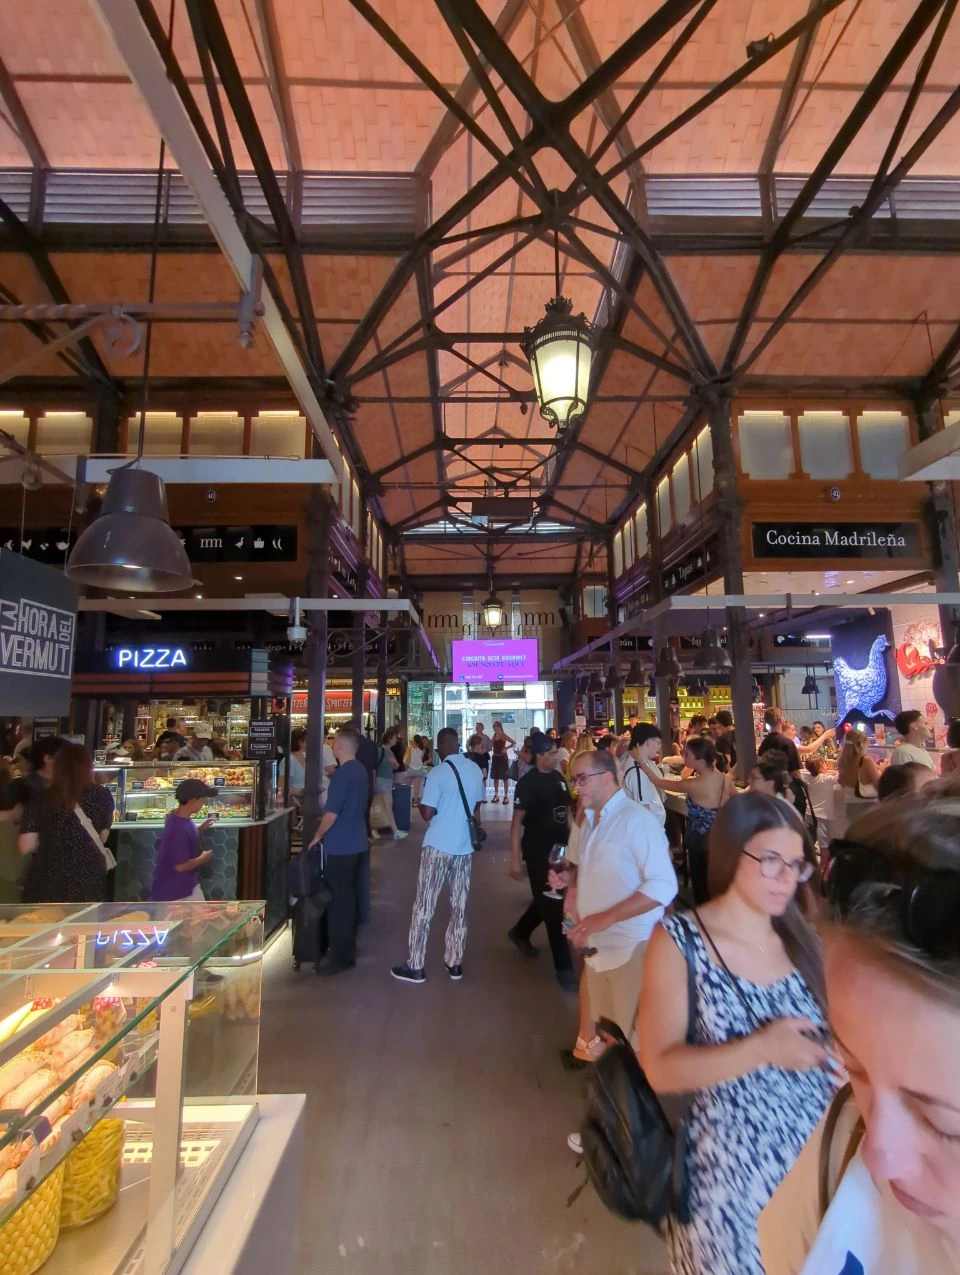
Use roughly eight minutes, from minute 15 to minute 23, for the walk past Mercado de San Miguel. This is a short burst of colour and city energy rather than a full stop. Reflections, ironwork and passing pedestrians can add life to the photographs while leaving plenty of time for the rest of the route.
Allow approximately 15 minutes, from minute 23 to minute 38, for Arco de Cuchilleros and the surrounding approach. The steps, changing levels and broad stone arch introduce stronger movement and depth before you enter Plaza Mayor.
Save roughly the final 22 minutes for Plaza Mayor. Begin around the arcades and architectural edges, then move towards Casa de la Panadería, the equestrian statue and wider views whenever there’s enough space.
These are working targets, and the short walks between stops are included. Because you keep moving forward, most of the hour can still be spent taking photographs, with room for conversation and a few unhurried pauses. A slower walk simply shortens the market stop first.
Begin Among the Historic Layers of Plaza de la Villa
Start close to the architecture. An old doorway can frame a quiet portrait without making you feel exposed in a large open space. The tower brings a stronger vertical line, while the stone walls and planted corners offer softer settings for natural expressions and close interactions.
The passage between Casa de la Villa and Casa de Cisneros is especially useful for movement. You can walk through it together, glance back towards the square or pause where the buildings create a layered historic background. It feels recognisably Madrid and gives you a gentle introduction before the larger, livelier setting of Plaza Mayor.
That gentle beginning matters. Most people need a little time to relax, whether you’re travelling as a couple, gathering a family or stepping in front of the camera on your own. Plaza de la Villa gives you that time without sacrificing visual variety.
Around 15 minutes is usually enough for close portraits, a short walking sequence and one or two wider architectural photographs. Once those quieter images are in place, you’re ready for the brighter streets ahead.
Add a Lively Moment at Mercado de San Miguel
Keep this part light and mobile. Walk past the windows, use a reflection for a more playful portrait or pause briefly with the market’s metal structure behind you. On a lively pavement, a tighter frame can capture the glass, ironwork and street atmosphere while keeping you at the centre of the photograph.
Because the market stays busy throughout the day, the scene can look different from one session to the next. Deliveries, terraces and groups of visitors may make one side more active than another. That activity can add a lively Madrid feeling, and a closer view or another side of the building can work beautifully at that moment.
Going inside is optional. The exterior already provides everything this part of the route needs, so you can continue towards Arco de Cuchilleros whenever the entrance or interior feels too crowded for a comfortable photograph.
Save food and browsing for afterwards. A tasting is even more enjoyable after the session, when you can explore and stay as long as you like.
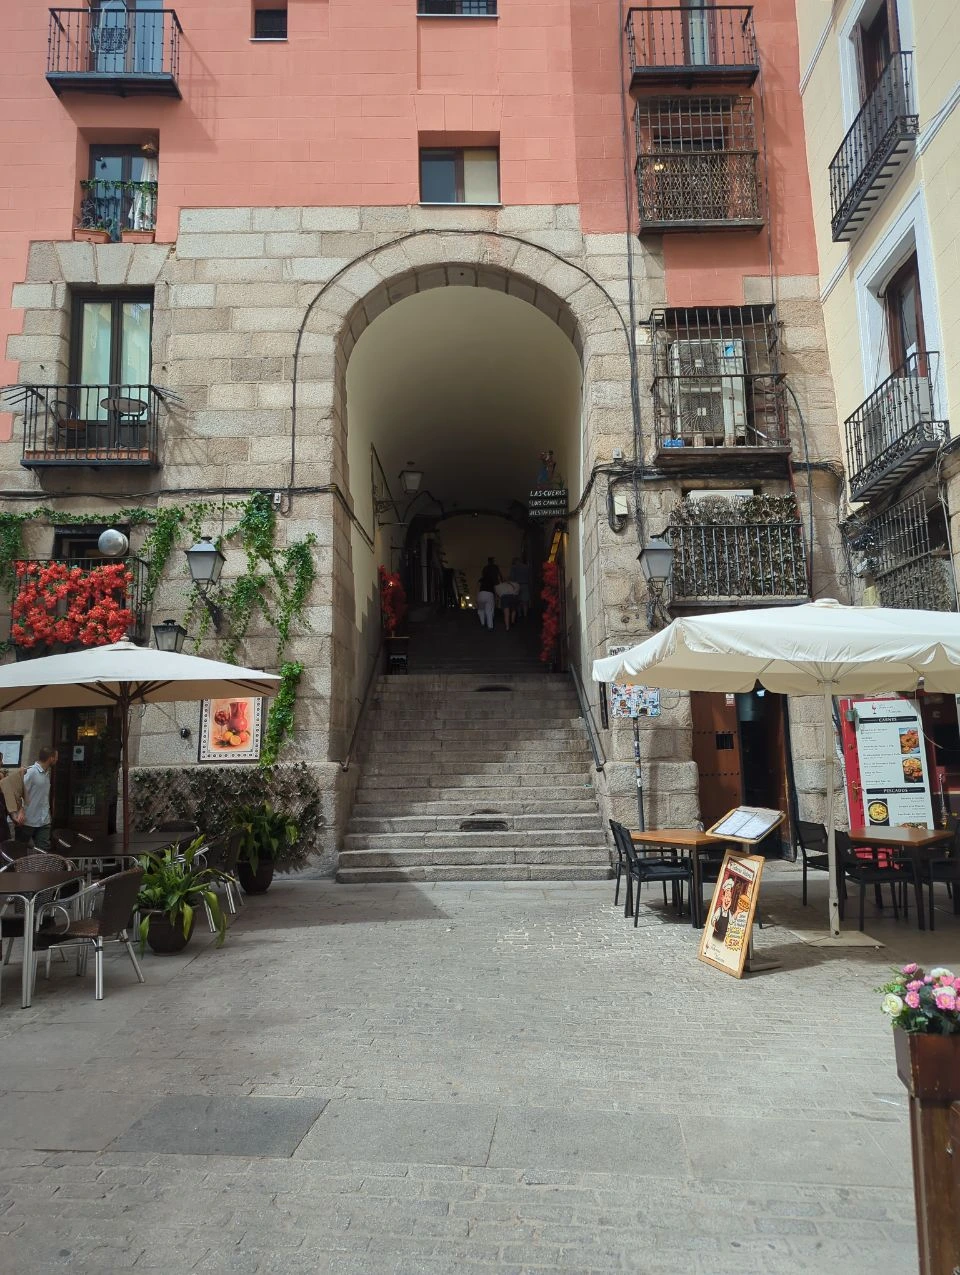
Let Arco de Cuchilleros Add a Dramatic Turn
Approach it while walking rather than treating it as another place to stand still. The narrowing walls draw attention towards you, while the incline helps everyone fall naturally into different positions as you walk. A glance back, holding hands on the steps or a quick pause beneath the arch can feel natural because the setting already suggests movement.
The most exciting moment comes as you continue towards the square. The surrounding streets feel close and enclosed, then Plaza Mayor appears ahead with far more colour, height and open space. You don’t need an elaborate pose to make that change feel special. The architecture does most of the work.
If the steps suit your group, use them for a short walking sequence or seated portrait. For a more comfortable street-level approach, stay around Calle del Maestro Villa and the nearby gateway, where the stone walls and rising architecture can still create depth. Nearby terrace seating may change the clearest angle, so a closer view of the arch can be just as strong.
Keep the landing beneath the arch and the passage into Plaza Mayor clear. Take the walking photographs first, pause briefly against a side wall when space allows and continue into the square while the city moves around you.
Begin Beneath the Plaza Mayor Arcades, Then Step Into the Square
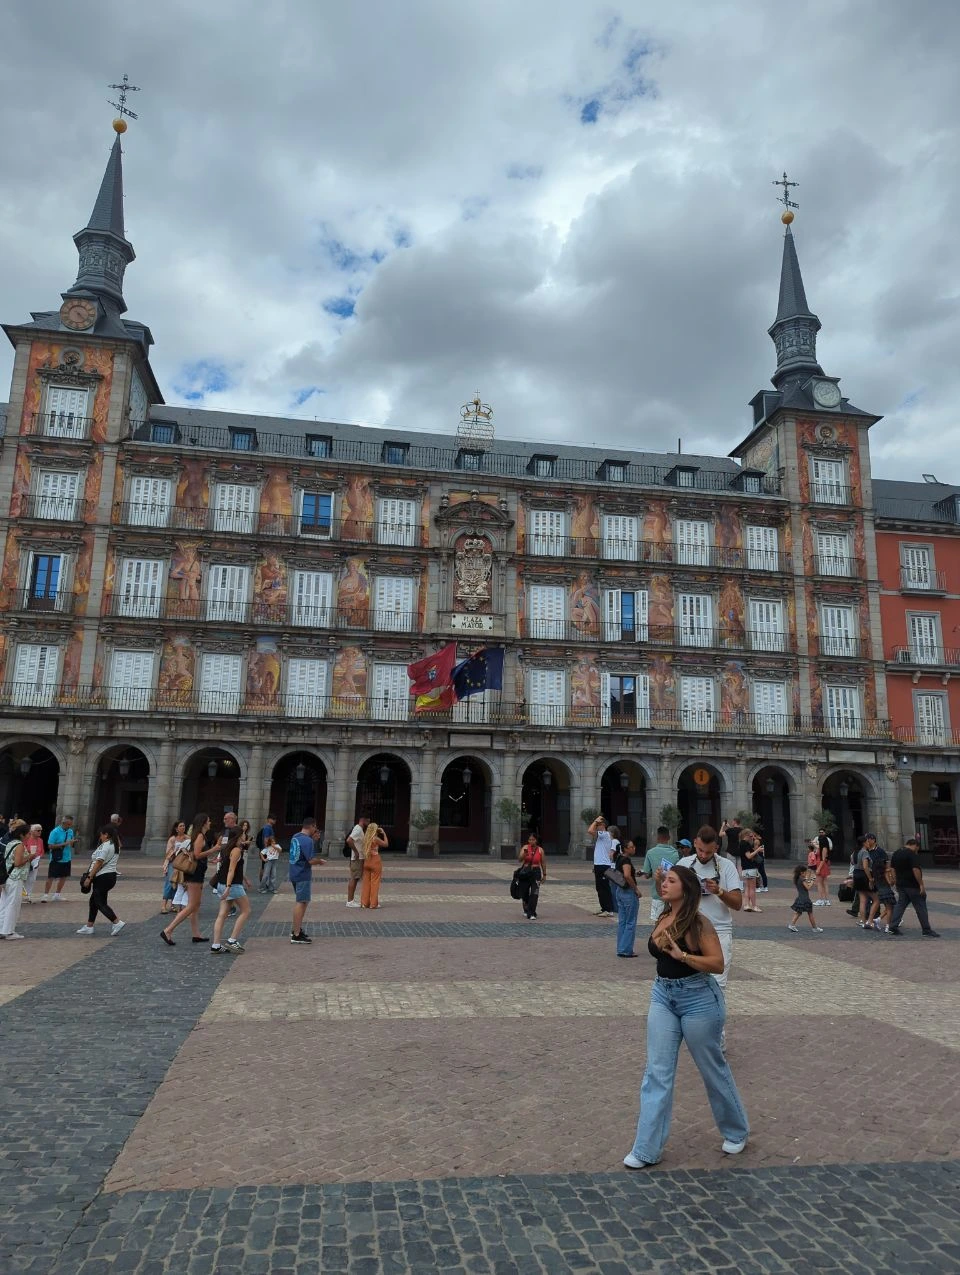
The arcades, columns and entrance arches offer natural frames around you. They immediately establish the location while keeping the composition focused, even when the centre of the square is lively. You can walk beneath the arches, pause near a column or use the darker arcade against the brighter square for a more dramatic portrait.
Casa de la Panadería then adds an ornate focal point. Its decorated facade feels noticeably richer after the old stone around Arco de Cuchilleros, helping the final part of the gallery feel celebratory rather than repetitive.
The equestrian statue adds another unmistakable Madrid detail when there’s enough space nearby. It doesn’t need to dominate the photograph. Even a partial view between the surrounding architecture can connect the portrait to the scale of the square.
Finish with wider photographs when the centre opens up naturally. When the square stays lively, the arcades, gates and facade details still create unmistakable Plaza Mayor images. Passing people may even add a sense of movement and occasion, particularly in photographs where you’re walking rather than standing still.
Light and shade change across the square throughout the day, and the whole square is never evenly shaded. Starting beneath the arcades gives you several flattering options before you move into the centre for a wider view. Our first-hand morning scout found a calmer pre-breakfast atmosphere and longer shade, although current conditions still shape every session. The Madrid photoshoot timing guide helps you compare that quieter morning light with a later start.
By the end, the surroundings have grown from quiet doorways to one of Madrid’s most theatrical spaces. The distance is short, but the final gallery can feel remarkably varied.
How to compress your Plaza Mayor Madrid photoshoot route
Keep enough time for Plaza de la Villa because it gives you a calm beginning and visual details that won’t appear later. A few strong portraits there are more valuable than trying to cover every doorway or facade.
The Arco de Cuchilleros section can also be concise, but it’s worth retaining the walk beneath the arch and the transition into Plaza Mayor. Those moments connect the smaller historic streets to the scale of the final square.
In Plaza Mayor, choose one arcade, one portrait featuring the decorated facades and a wider photograph if space allows. Together, those three choices give you a complete finish without circling the entire square or waiting for a particular corner to quieten.
The market is the easiest part to reduce because the other three stops create the route’s main progression. Even after that adjustment, the hour still moves from intimacy to movement and finally to a grand Madrid finish.
What to check for a smooth session
Shortly before your session, take one quick look at events, temporary installations, terrace seating and current market access. These are active public spaces, so no one can promise privacy, silence, empty backgrounds, permanent shade, unchanged business hours or unrestricted commercial setups. The nearby alternatives at every stop keep the plan flexible.
Check Mercado de San Miguel’s official website shortly beforehand if you’re considering an interior photograph. Entry isn’t essential, so the route remains complete if you stay outside or simply use the market as a colourful passing moment.
When an event or temporary installation changes one familiar view in Plaza Mayor or around the arch, a small adjustment usually reveals another strong option nearby. Move a few metres, choose another entrance or come closer to the architecture and keep the same walk.
Your photographer will choose comfortable positions that leave entrances, crossings and pathways open. A busy doorway is easy to swap for a side view, a closer portrait or the next nearby backdrop while you keep moving naturally.
When one planned view is occupied, keep moving forward: use another Plaza de la Villa doorway, photograph the market more closely, approach the arch from Calle del Maestro Villa or remain beneath Plaza Mayor’s arcades. You keep the four planned looks without adding extra walking.
Choose a 30-Minute or Relaxed 90-Minute Route
Leaving out Plaza de la Villa and Mercado de San Miguel is better than rushing through all four locations. You’ll have time to relax into the photographs beneath the arch, enjoy the entrance into the square and create a complete miniature version of the original route.
For a relaxed 90-minute session, keep the same forward direction and give the strongest settings more room. Linger around the passage between Casa de la Villa and Casa de Cisneros, add a walking sequence around Calle del Maestro Villa and take your time beneath the arch. Then spend longer beneath the Plaza Mayor arcades before moving into the square for wider photographs.
Use the extra time where it changes the gallery most: add a seated or walking portrait near the arch and photograph a second Plaza Mayor arcade. For a celebratory finish, take one relaxed photograph with a drink near the square’s edge, then put the camera away and stay for a toast or café. The walk ends at its natural destination, with time to enjoy the moment.
Let the hour feel like your Madrid story
With children, Plaza de la Villa can begin with simple games around the doors and planted corners. Keep the market moment short, then use one playful walk near the arch instead of repeating poses on the steps. That saves their energy for the colour and excitement of the final square.
Four settings are enough because the story keeps changing: quiet doorways help you settle in, the market adds a flash of modern Madrid, the arch builds anticipation and Plaza Mayor delivers the celebration. By the final wide photograph, the hour feels bigger than the distance you’ve walked.
Let's Plan Your Madrid Photoshoot
Plaza Mayor Madrid photoshoot route FAQs
Yes. Four neighbouring settings follow one forward path with no planned backtracking, so the walking stays compact. If conversation, children or a gentler pace use more time, reduce the market beat first.
Start in Plaza de la Villa. Morning can bring calmer streets and longer shade, but the exterior-only market photographs mean the walk doesn’t depend on opening hours. Later in the day, follow the same sequence from Plaza de la Villa and begin beneath the arcades when you reach Plaza Mayor, then move into the open square.
No. The planned market moment uses the iron-and-glass exterior, reflections and surrounding street life, so the walk doesn’t depend on entering or arriving during fixed opening hours.
Cut the market pause first. You’ll still have time for the quiet start in Plaza de la Villa, the walk beneath the arch and the Plaza Mayor finale.
Tell your photographer about pushchairs or mobility needs before the session. They can replace the stepped sequence with Calle del Maestro Villa and the nearby gateway, choose a comfortable entrance into Plaza Mayor and allow more walking time. When a completely step-free walk is essential, recheck the exact access on your session date.
Start at Arco de Cuchilleros and finish in Plaza Mayor. This gives you the strongest visual contrast with the least walking.
Not necessarily. The arcades and closer portraits can turn activity into atmosphere, while arches and columns keep the background focused. A wider central photograph is a lovely bonus when space opens naturally, and the session never depends on an empty square.


Where to Propose in Florence: Choose the Proposal Style She Would Love
Where to Propose in Florence: Choose the Proposal Style She Would Love
What to Wear for a Temple Photoshoot in Bangkok
What to Wear for a Rome Photoshoot: An Outfit That Moves With You
What to Bring to a Bangkok Photoshoot
Wat Pho or Wat Arun: Which Bangkok Temple Is Better for Photos?
ENJOY $20 OFF
Your first photoshoot when you become an email subscriber.
Related Articles
Where to Propose in Florence: Choose the Proposal Style She Would Love
Find the Florence proposal setting that feels most like her, from peaceful gardens and hidden viewpoints to classic landmarks and stylish rooftop evenings.
Where to Propose in Florence: Choose the Proposal Style She Would Love
Discover where to propose in Florence, from quiet gardens and hidden viewpoints to classic landmarks, romantic rooftops and relaxed Oltrarno streets.
What to Wear for a Temple Photoshoot in Bangkok
Choose a comfortable, respectful and photogenic outfit for a temple photoshoot at Wat Pho, Wat Arun or the Grand Palace in Bangkok.